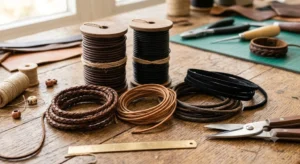
The Ultimate Guide to Working with Real Leather Cord: Styles, Techniques, and Crafting Secrets
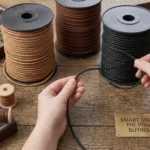
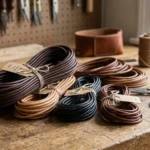
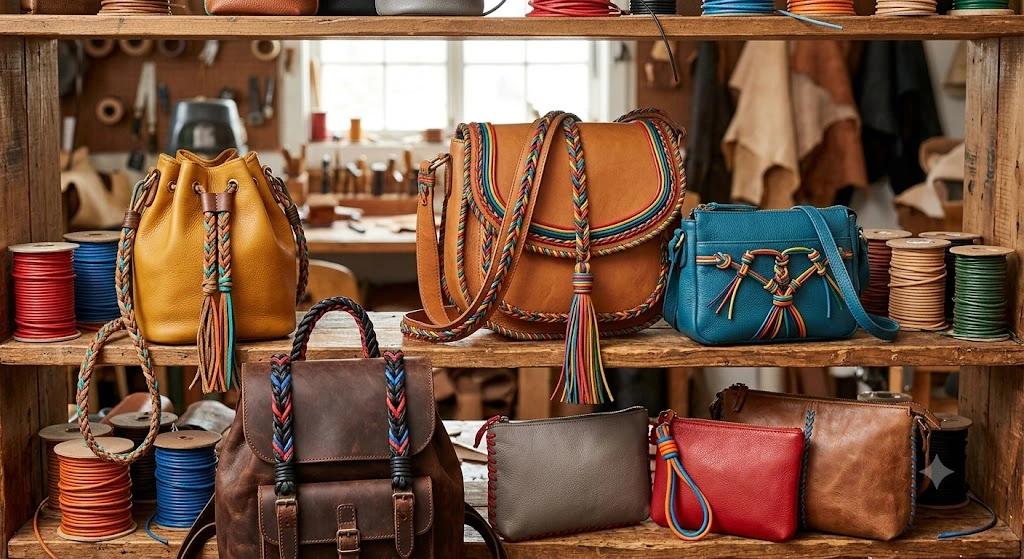
If you are looking for high-quality Leather Cords in UK workshops and crafting spaces, finding material that won’t snap, fray, or look cheap can be a real challenge. Many crafters spend hours searching through craft boxes for the perfect stringing material, only to settle for synthetic faux-suede or stiff plastic cords that lack durability and style. Genuine leather offers something entirely different. Whether you’re creating a rugged multi-wrap bracelet, stringing a statement pendant, crafting a custom necklace, or adding decorative lacing to a leather project, Real Leather Cord provides exceptional strength, flexibility, and a timeless natural finish. Unlike synthetic alternatives, genuine leather develops a beautiful character over time, making it the preferred choice for jewelry makers, DIY enthusiasts, and professional leatherworkers across the UK.
For makers, designers, and hobbyists searching for quality leather cords in uk workshops, navigating the sheer variety of cuts, thicknesses, and finishes can feel a little overwhelming. Let’s break down everything you need to know about choosing, styling, and caring for genuine leather cord so your next handmade piece looks effortlessly professional rather than like a rushed school art project.
Why Choose Real Leather Over Synthetics?
Let’s be honest: fake PU leather or synthetic suede cords are cheap, but they come with a major expiration date. Within a few weeks of skin contact, cheap coatings start to peel, crack, and flake off, revealing a weak fabric or paper core underneath.
Real hide behaves completely differently. Genuine leather breathes, absorbs natural body oils over time, and develops a rich, buttery patina that only gets better the more you wear it.
-
Durability under tension: Full-grain and top-grain hides possess natural tensile strength. A solid strip of hide can withstand significant pulling forces without snapping.
-
Skin comfort: Unlike plastic-coated cords that trap sweat and stick uncomfortfully to the skin, natural leather remains breathable and soft.
-
Ageing gracefully: The friction of daily wear polishes real leather, deepening its tones and softening any initial stiffness.
Tanning Types: Vegetable-Tanned vs. Chrome-Tanned
Understanding how your hide was processed is key to picking the right material for your project. The two primary tanning methods yield very different handling properties:
| Tanning Method | Characteristics | Best Uses |
| Vegetable-Tanned (Veg-Tan) | Firm, holds shape, absorbs oils, patinas heavily, eco-friendly plant dyes. | Braiding, structural wraps, molded loops, tool-stamped flat cords. |
| Chrome-Tanned | Soft, pliable right out of the roll, highly water-resistant, rich vibrant colors. | Garment lacing, soft neck cords, tassel fringes, flexible wrap bracelets. |
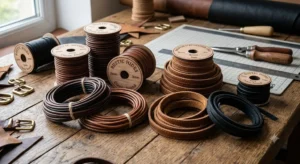
Navigating the Lineup: Profiles and Styles
When you start browsing for materials, you will quickly notice that leather isn’t just sold in one uniform shape. Different styles serve completely different structural and aesthetic purposes.
1. Flat Leather Cord
A flat leather cord features a wide, low-profile footprint that rests cleanly and comfortably flat against the skin or garment surface. Because of its geometric shape, it refuses to twist, flip, or roll around when worn as a wrist cuff or choker.
-
Best used for: Wide wrap bracelets, rustic watch strap replacements, bookbinding spine ties, bag trim, and belt accents.
-
Pro styling tip: Because it distributes weight across a broader surface area, it’s ideal if you want to mount heavier metal sliders or riveted hardware without the band sagging or biting into the skin.
2. The Classic Round Profile
Round cord is the absolute bread-and-butter of the jewelry world. Sliced evenly from high-grade hides and rounded through precision dies, it offers a clean, organic look.
-
Best used for: Simple pendant drops, adjustable slip-knot necklaces, and minimalist beaded cuffs.
-
Pro styling tip: If you are shopping online and wondering how it compares to options you might casually browse on global retail hubs or hobby chains akin to a leather cord walmart or craft staples from a leather cord michaels storefront, always check the material specification. Look for vegetable-tanned or chrome-tanned full hide rather than glued leather dust composites, which snap easily when pulled tight.
3. Braided & Greek Leather Cord
Braided options combine multiple smaller strands interwoven around a core fiber. Greek leather, in particular, is renowned worldwide for its uniform round precision, exceptionally smooth finish, and tight weave.
-
Best used for: High-end nautical bracelets, rugged men’s chokers, and heavy-duty key fobs.
-
Pro styling tip: When cutting braided cord, wrap a small piece of masking tape tightly around the cut zone first, then slice through the middle of the tape. This stops the individual strands from unraveling while you attach end fittings.
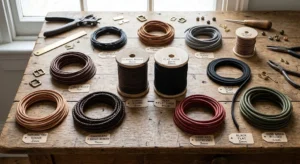
Finding the Right Fit: Sizing Demystified
Thickness matters tremendously. Choose the wrong diameter, and your favorite beads won’t slide over the ends, or your necklace will end up looking like a heavy-duty dog leash.
-
Fine Diameters (1mm – 2mm): Micro cords are subtle, delicate, and lightweight. They work brilliantly for multi-wrap seed bead bracelets, detailed macramé leather knots, or stringing gemstone briolettes with tiny drill holes.
-
Mid-Range Cords (3mm – 4mm): This is the sweet spot for daily-wear pendant necklaces and standard single-strand charm bracelets. It has enough physical presence to stand on its own without needing bulky embellishments.
-
Heavy-Duty Scales (like a robust leather cord 6mm or larger): When you step up to a leather cord 6mm profile, you are entering heavy utility and statement territory. This thickness is fantastic for chunky men’s wristbands, heavy lanyards, or rugged drawstrings for waxed canvas rucksacks.
Color Psychology and the Power of Neutral Tones
The color of your leather sets the emotional and visual foundation for your design. While rich chestnuts, cognac tans, and vintage saddle browns offer a gorgeous, rustic, earth-toned charm, one shade stands undisputed as the ultimate workshop staple: leather cord black.
Why is a spool of leather cord black an absolute must-have in any maker’s kit?
-
High contrast pop: Bright silver hardware, polished copper beads, and vibrant gemstone cabochons instantly jump out and command attention against a deep obsidian background.
-
Seamless versatility: Black matches virtually any wardrobe palette, making it universally wearable for everyday accessories.
-
Discreet transitions: When you are gluing end caps or tying complex knots, black hides minor adhesive blunders or friction wear much better than pale, sensitive tans.
Essential Knots Every Leather Crafter Must Master
You don’t always need metal clasps to finish off leather jewelry. In fact, traditional sliding knots often look cleaner and allow the piece to be resized effortlessly.
The Double Fisherman’s Sliding Knot (For Adjustable Necklaces)
This classic sliding knot lets the wearer pull the cord to tighten or loosen a necklace easily without hardware.
-
Lay the two ends of your leather cord for necklace designs parallel to each other, pointing in opposite directions.
-
Take the tail end on the right, wrap it back over both cords twice toward the right, forming two clean loops.
-
Pass the tail back through both loops and pull tight to form a solid barrel knot.
-
Repeat the process with the left tail end wrapping around the main right cord.
-
Trim any excess tail flush with the knot, adding a micro-dot of clear flex-glue to secure the core.
The Sliding Sliding Button Loop
Ideal for flat cords or thick round strands where metal clasps look out of place:
-
Double one end of the cord over to form a tight 1cm loop.
-
Bind the base of the loop tightly with fine 1mm cord or waxed thread using a coil whip-stitch.
-
On the opposite end, thread a hardwood or horn button. Securing the button inside the loop gives a clean, rustic closure.
Step-by-Step Projects
Project 1: Making a Minimalist Pendant Necklace
If you have a gorgeous focal pendant sitting in your studio and want to build a clean, modern necklace to showcase it, here is a quick guide using a sturdy 3mm round or flat strand.
What You Need:
-
50cm of high-grade 3mm natural leather cord
-
1 x Metal focal pendant with a bail loop larger than 3.5mm
-
2 x Matching glue-in end caps
-
1 x Lobster claw clasp and closing jump rings
-
Professional jewelry adhesive (such as a flexible two-part epoxy)
The Assembly Steps:
-
Measure and cut: Wrap the raw cord loosely around your neck to test the drop length, allowing an extra 2cm for your end hardware fittings. Cut cleanly with sharp shears at a 90-degree angle.
-
Thread the focal piece: Slide your statement pendant directly onto the center of the cord so it rests smoothly at the lowest point of the curve.
-
Prep the ends: Dab a tiny drop of jewelry-grade epoxy inside your metal end caps. Push the trimmed leather ends firmly into the barrels, twisting slightly to ensure the glue coats the fibers evenly. Wipe away any immediate squeeze-out with a damp swab.
-
Attach the clasp: Let the glue cure completely for at least 24 hours. Once set, attach your lobster clasp and jump rings to the loops of the end caps using flat-nose pliers.
Crafting a Multi-Strand Leather & Bead Wrap Bracelet
This double-wrap design pairs a 2mm leather cord black strand with natural stone beads for a sleek, layered wrist cuff.
What You Need:
-
1.2 meters of 2mm round black leather cord
-
30-40 x 6mm gemstone beads with 1.2mm+ drill holes
-
1.5 meters of waxed nylon thread or fine leather cord
-
1 x Metal shank button or toggle clasp
-
Beading needle and hypo-cement glue
The Assembly Steps:
-
Form the base: Fold your 1.2m leather cord in half. Tie an overhand knot at the bend to create a loop just large enough to fit your shank button snugly.
-
Secure the thread: Tie your waxed thread firmly onto the top strand right below the main knot.
-
Weave the beads:
-
Thread a bead onto your needle.
-
Pass the needle over the top leather strand, through the bead, and under the bottom leather strand.
-
Pull snug so the bead sits firmly nested between the two parallel leather rails.
-
Loop the thread back over the bottom rail, through the same bead in reverse, and under the top rail to lock it in place.
-
-
Repeat to length: Continue stringing beads until the woven section wraps twice comfortably around your wrist (approx. 34-36cm).
-
Finish: Tie a secure multi-knot around both leather strands with your thread. Tie a final overhand knot in the main leather cord, leave a small button gap, and tie a second closing knot. Trim the excess tails cleanly.
Workshop Troubleshooting Guide: Fixing Common Leather Cord Issues
Even experienced crafters run into minor issues when working with natural hides. Here is how to handle the most common headaches:
-
Issue: The cord arrives with set kinks or tight curls from being spooled.
-
Solution: Dampen the cord lightly with warm water (do not soak it). Hang it vertically with a small clip-weight attached to the bottom for an hour. As it dries, the fibers will relax into a straight line.
-
-
Issue: The leather feels stiff, dry, or scratchy against the skin.
-
Solution: Warm a pea-sized dab of natural mink oil or conditioner between your palms. Work the cord back and forth through your hands to warm up the fibers and introduce supple flexibility.
-
-
Issue: End caps keep slipping off after a few days of wear.
-
Solution: Avoid quick-dry superglue—it dries brittle and snaps under flex. Use flexible two-part epoxy or polyurethane adhesives (like E6000 or Hypo Cement). Always roughen the smooth outer surface of the leather tip with fine sandpaper before gluing to give the adhesive something to grip.
-
Sourcing in Bulk and Scaling Up
If you run a small handmade jewelry business or find yourself constantly running out of materials during high-production seasons like the autumn craft fair rush, buying single short meter cards from local retail shops gets expensive fast.
This is where transitioning to a leather cord bulk supplier makes total financial and creative sense. Buying on continuous 25-meter or 50-meter spools drastically drops your per-meter cost, minimizes annoying end scraps, and ensures consistent dye lots across your entire product line. When sourcing wholesale rolls online, always ask suppliers whether their stock is continuously extruded or spliced, and confirm whether the dye is colorfast (meaning it won’t bleed onto your clothes or skin on a hot, sweaty summer day).
Caring for Your Leather Creations
Natural leather is organic, which means it requires a tiny bit of love to stay supple over the years.
-
Keep it dry: While a light splash won’t hurt, avoid swimming, showering, or saunas with your leather jewelry. Extended submersion waterlogs the fibers, causing them to warp, shrink, or weaken as they dry out.
-
Condition occasionally: If your cord starts looking a bit dry or dusty after months of heavy wear, rub a minuscule drop of natural leather conditioner or beeswax into the surface with a soft microfiber cloth. Buff it gently to restore its rich luster.
-
Storage matters: Store your pieces flat or hanging loosely in a cool, dry spot away from direct sunlight. Tightly coiling leather cords into cramped, airtight plastic bags for months can set permanent kinks into the grain and trap humidity.